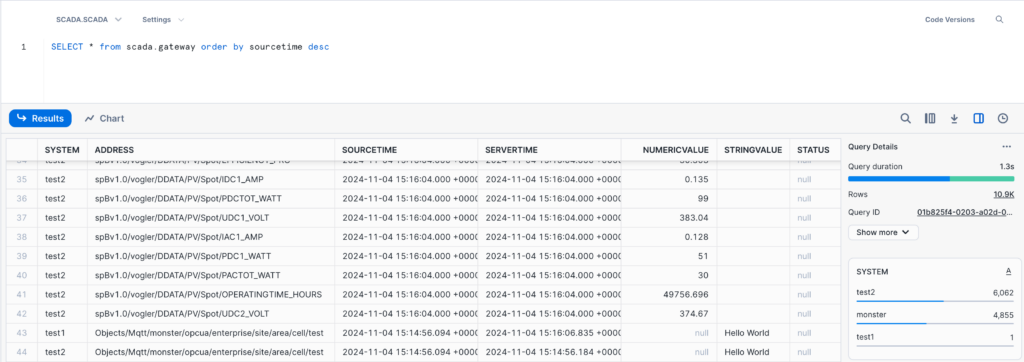
In that example we take SparkplugB messages from a MQTT Broker, decode it and write it to Snowflake. And we take some OPC UA nodes and write it also to the same table.
Create a database and a schema for your destination table.
CREATE OR REPLACE SCHEMA scada;Create the table for the incoming data:
CREATE TABLE IF NOT EXISTS scada.gateway (
  system character varying(1000) NOT NULL,
  address character varying(1000) NOT NULL,
  sourcetime timestamp with time zone NOT NULL,
  servertime timestamp with time zone NOT NULL,
  numericvalue float,
  stringvalue text,
  status character varying(30),
  CONSTRAINT gateway_pk PRIMARY KEY (system, address, sourcetime)
  );
Generate a private key:
> openssl genrsa 2048 | openssl pkcs8 -topk8 -v2 des3 -inform PEM -out snowflake.p8 -nocrypt
Generate a public key:
> openssl rsa -in snowflake.p8 -pubout -out snowflake.pub
Set the public key to your user:
> ALTER USER xxxxxx SET RSA_PUBLIC_KEY=’MIIBIjANBgkqh…’;
Replace MIIBIjANBgkqh… with your public key from the snowflake.pub file (without —–BEGIN PRIVATE KEY—– and without —–END PRIVATE KEY—–)
Details about creating keys can be found here
Prepare the Gateway
Add a Snowflake logger section to the gateways config.yml. In that example we take SparkplugB messages from a MQTT Broker, decode it and write it to Snowflake. And we take some OPC UA nodes and write it also to the same table.
Drivers:
  OpcUa:
    - Id: "test1"
      Enabled: true
      LogLevel: INFO
      EndpointUrl: "opc.tcp://test.monstermq.com:4840/server"
      UpdateEndpointUrl: true
      SecurityPolicy: None

  Mqtt:
    - Id: "test2"
      Enabled: true
      LogLevel: INFO
      Host: test.monstermq.com
      Port: 1883
      Format: SparkplugB

Loggers:
  Snowflake:
    - Id: "snowflake"
      Enabled: true
      LogLevel: INFO
      PrivateKeyFile: "snowflake.p8"
      Account: xx00000
      Url: https://xx00000.eu-central-1.snowflakecomputing.com:443
      User: xxxxxx
      Role: accountadmin
      Scheme: https
      Port: 443
      Database: SCADA
      Schema: SCADA
      Table: GATEWAY
      Logging:
        - Topic: opc/test1/path/Objects/Mqtt/#
        - Topic: mqtt/test2/path/spBv1.0/vogler/DDATA/+/#
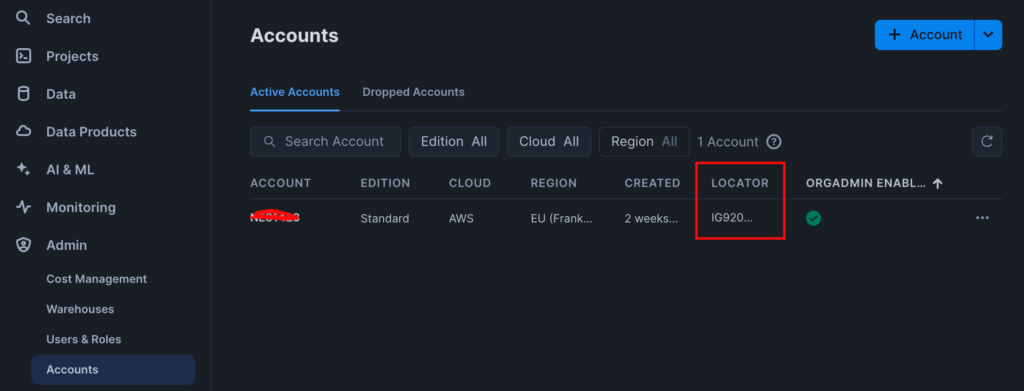
The Url you can find in the Snowflake web console by going to Admin/Accounts and then hover over the “Locator” column.

Start the Gateway
> git checkout snowflake
> cd automation-gateway/source/app
> ../gradlew run
Note: Using gradlew to start the gateway is not recommended for production. Instead, consider using a Docker image or the files from the build/distribution for a more robust setup..

